How To Conquer Your Kitchen Deep Clean Checklist for a Spotless Kitchen
The kitchen is the heart of the home which means it needs a really good deep cleaning occasionally. Here’s a kitchen deep clean checklist to help you get through it all.
You follow a weekly cleaning routine, but there’s bound to be a bit of dust and grime build-up you miss. It’s hiding out in the corners of your drawers and cabinets and underneath all of those kitchen appliances.
No judgments. I don’t know a single person that wipes out their cabinets or pulls out their refrigerator on a weekly basis. If you do, tell them I’m impressed because I just don’t have that kind of time and energy.
I clean my kitchen surfaces daily, then I follow this kitchen deep clean checklist a couple of times a year. Once in March or April for spring cleaning checklist, and again in October when I’m getting ready for the holidays.
My deep cleaning routine ensures that I clean every surface in my kitchen at least once a year. That doesn’t sound like a lot, but it’s manageable for me. And my home isn’t dirty by any stretch of the imagination.
Want to know what else you should be cleaning or deep cleaning? Check out my Cleaning page.
Tidy Your Kitchen Before You Start the Kitchen Deep Clean Checklist
Deep cleaning the kitchen is a little more involved than your normal cleaning routine and will take a little longer. Don’t make it harder by starting with a really messy kitchen.
If your kitchen is messy, tidy up, take care of food items, dirty dishes, and any other daily mess. Empty the garbage cans and remove any general surface clutter before getting started.
Want to make your deep cleaning even easier, do a thorough kitchen declutter before you start deep cleaning. Cleaning goes faster when there are fewer things to clean.

This post may contain affiliate links. Please see my disclosure policy for details.
Kitchen Deep Clean Checklist
The kitchen deep clean checklist is broken down by specific tasks so you can tackle it in smaller chunks as time permits. If you have a big block of time, you can get it all done in one cleaning session. Just start at the top and work your way down the list.
Note: I didn’t include any small appliances like the coffee pot, toaster oven, crockpot, etc. These are some of the germiest spots in your kitchen and should be cleaned much more often1.
Gather Your Supplies – 5 minutes
Before you start any deep-cleaning project, it’s a good idea to gather your supplies so you don’t get distracted looking for stuff.
Here’s a list of supplies I use for deep cleaning my kitchen.
- Rubber Cleaning Gloves – I use basic disposable gloves from the hardware store for my general cleaning. I switch to the heavier rubber cleaning gloves for any tough messes or harsh chemicals.
- Microfiber Cloths – You’ll need several microfiber cloths. Here are the ones I use, and they come in a handy 24 pack.
- Dusting Wand – Your favorite dusting wand or Swiffer. Sometimes I just use my microfiber cloths.
- Stiff Bristle Detail Brush – Try a paintbrush or grout brush.
- Scrubber Sponge – Use a good scrubber sponge for cleaning the stovetop, oven, and other tough spots.
- Vacuum with Upholstery Attachment (optional) – A smaller portable one works best.
- Glass or multi-surface cleaner – Your favorite cleaning spray. I really like this multi-surface cleaner.
- Multi-Purpose Cleaner – I like this scrubbing cleaner.
- Canned Air – If you have a window in your kitchen, this window cleaning hack will make it super easy.
- Drain Cleaner – I use hydrogen peroxide and baking soda.
Clean the Ceiling and Light Fixtures – 15 minutes
I always start with the ceiling so I’m not knocking dust and dirt down on surfaces that I’ve already cleaned. Important cleaning tip, always work top to bottom and left to right.
Remove all lighting fixture covers, then soak them in a sink of warm soapy water. If they aren’t removable, dust them now.
Dust off your ceiling and lighting fixtures paying close attention to any hanging cords, chains, or intricate fixtures. This is a great time to wipe off the light bulbs with a clean microfiber cloth.
Scrub, rinse, dry and replace the light fixture covers you’ve been soaking in the sink.

Wash the Walls, Doors, and Moldings – 20 minutes
Working top to bottom to prevent water streaks, wash your kitchen walls, moldings, and doors with a damp microfiber cloth. Don’t forget the door handles and hinges.
I like to use a microfiber mop on larger wall areas and just a hand cloth on the smaller areas. The microfiber mop makes the wall washing go a lot quicker if your wall space is big enough.
Don’t worry about the wall behind the refrigerator and stove, you’ll do these when you deep clean each appliance.
Clean the Upper Cabinets – time varies depending on the number of cabinets
I broke this into 3 different sections in case you can only work in small sections of time.
Clean the Cabinet Tops – 10 minutes
Dust or vacuum the cabinet tops and wipe them down with a cleaning cloth to remove any build-up. Don’t worry about the cabinet boxes themselves, you’ll clean those after you clean out the interiors.
Clean the Cabinet Interiors – 10 minutes per cabinet
One cabinet at a time, remove the contents and wipe out the interior with a cleaning cloth working top to bottom. Make sure you wipe all interior walls and don’t forget the underside or faces of the shelves. Also, pay special attention to the corners.
Put your stuff back in the cabinet, making sure to wipe off any dusty items before putting them back.
Clean the Cabinet Exteriors – 10 minutes
Wipe down the doors, side panels, and knobs/handles. If you have intricate handles, you might need to grab the grout brush to get into the crevices.
Wash the Kitchen Windows – 10 minutes per window
Depending on the type of window coverings you have, you’ll want to clean them first. Clean blinds or roller shades while they’re still hanging.
If you have fabric window coverings, remove them and toss them in the washing machine. If they need to go to the dry cleaners, set them aside out of your way for now,
Next, wipe down the window frame, then use the canned air and brush to clean the window tracks. When you finish the window tracks, spray and buff the glass, then move on to the next task.

Clean the Microwave or Vent Hood – 15 minutes
If you have a venting microwave that hangs above your stove, this task could take closer to 30 minutes.
Remove the exhaust screens and/or turntable and soak them in soapy water. Wash the underside of the microwave/vent hood with a soapy cloth. Don’t forget the little channel the screens sit in.
If this area has a lot of greasy build-up, get a good degreaser or grab the big bottle of Dawn dish soap. Make sure you remove all of the greasy mess from this area.
When you’re done, wash down the interior of the microwave, and don’t forget the channels around the door.
If there’s splattered food inside of the microwave, nuke a bowl of water and half a lemon for 5 minutes. Be careful when removing the bowl because it will be very hot.
Wash, dry, and replace the turntable and exhaust screens, then clean and buff the front of the microwave, the control panel, and the door handle.
Empty and Clean Inside the Refrigerator – 25 minutes
The refrigerator is time-consuming, but I do recommend doing it in one session.
If you try to break it up, you’ll have to move your refrigerator while it’s full of food. This will likely be messy and be rough on your back.
Remove the front grate and drip pan at the bottom of the refrigerator and soak them in soapy water. If your drip pan access in the back of the refrigerator, do this after you pull your refrigerator away from the wall.
Remove the contents of the refrigerator and freezer and put them all on the counter. If you don’t have the counter space, use a box or laundry hamper.
Vacuum out any loose debris.
** Time Saver Tip: Have another family member wipe down the jars, bottles, and containers while you’re cleaning the refrigerator.
Wash the interior surfaces of the refrigerator. Make sure to wipe the top and bottom sides of the shelves.
Pull out any drawers and clean up the spills behind them.
Pay special attention to the crevices around the drawer slides and the channels the shelves sit in. You might need to use a toothpick or tip of a paring knife to clean the crevices.
Wipe down the sealing gaskets on the refrigerator and freezer. Make sure to clean up any dried food spills that have gotten in between the accordion folds.
GIVE YOUR HOME A THOROUGH CLEANING!
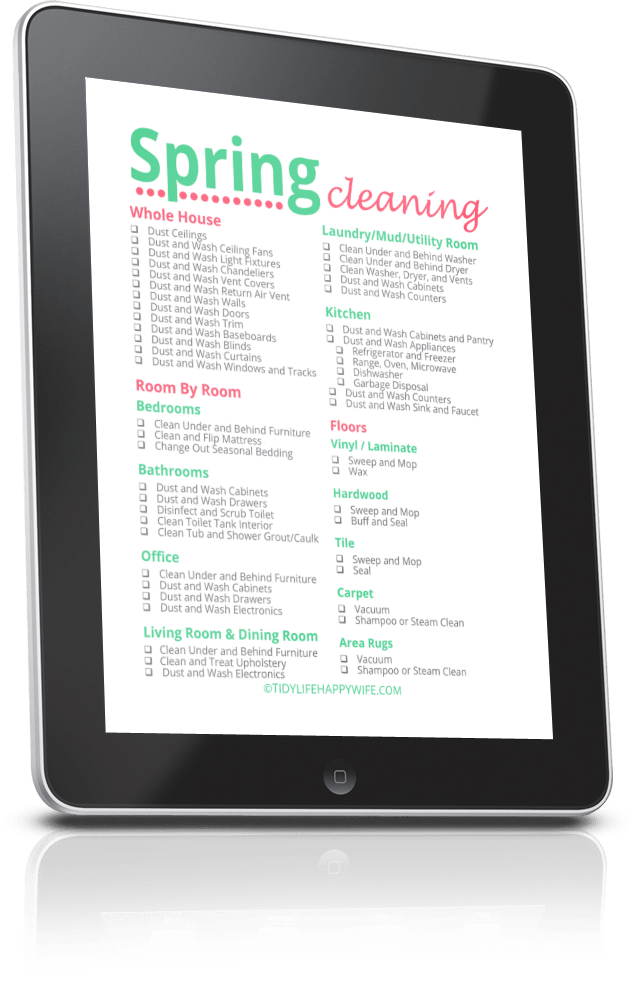
Join thousands of VIPs for cleaning, decluttering, and organizing tips sent straight to your inbox. As a welcome gift, we’ll send you this FREE printable Spring Cleaning Checklist that lists exactly what to deep clean in every room of your home.
Clean the Exterior and Behind the Refrigerator – 20 minutes
Pull the refrigerator away from the wall. Dust and wipe down the top of the refrigerator. Make sure to clean the top of the door and seal as well.
If you have an icemaker, unplug your refrigerator before cleaning the ice maker. You don’t want that thing engaging while you’re in there cleaning the ice hopper!
Remove and soak any washable pieces in soap and warm water. Clean out the inside of the icemaker and the dispenser channel the ice travels through.
Vacuum the coils (if they’re accessible) on the back of the refrigerator. Then wipe down the back and both sides of the unit.
Dust and wash the wall and the floor behind and underneath the refrigerator. Plug the refrigerator back in and push it back into place.
Wash, rinse, dry, and replace the drip pan and grate. Clean and shine the front of the refrigerator, including the ice maker/water dispenser drip tray.
Check all contents for expirations dates. Throw away any expired items, then wipe down all bottles and containers before putting them back in your refrigerator.
**Pro Tip: To prevent leaky condiment messes in your refrigerator, rinse the lid as needed. Also, wipe off the outer threads before sealing the container and putting it away.
Apply a little bit of petroleum jelly to the face of the door gaskets. This conditions the seals and prevents them from becoming brittle, cracking, and failing. It also helps the doors seal better.
Clean the Range – 30 minutes
Remove and soak the temperature knobs, then wipe down the control panel.
Clean the crusty bits off of the stovetop. Cover cooked on messes with a paste of Dawn dish soap, baking soda, and a little hydrogen peroxide. Let it sit for 5 to 10 minutes before scrubbing.
Remove your oven racks, scrape off any crusty bits, and soak the racks in warm soapy water. Try doing this in the bathtub or a container on the porch for less mess.
Scrape the crusty bits out of the oven, then cover the interior with the same paste you made above. Let that sit while you clean off the paste you painted on the stovetop.
Scrub and wipe out the oven. Don’t forget the glass on the oven door. If your oven is really dirty, you can follow these instructions for deep cleaning your oven.
Remove the contents of your oven drawer (if you have one) and set them on the counter. Vacuum the drawer out, then wipe down the interior.
**Fun Fact: Did you know that you shouldn’t store things in an oven drawer? These drawers were actually designed as warming drawers and heat up with the heat from the oven.
Once the interior is clean, pull the range out and wipe down the sides and back. Wash the walls and cabinets that surround the range, then scrub the floor.
Push the range back, then scrub, rinse, dry, and replace the knobs and oven racks. Clean and buff the front of the oven, the glass door, and the oven handle.
Clean the Kitchen Drawers – 5 minutes per drawer
Start with your upper drawers and work your way down and around the kitchen one at a time.
Empty the contents onto the countertop, then vacuum and wash out the interior. Pay special attention to the top sides of the drawer and the upper area around the front of the drawer. These places tend to collect crumbs and messes from dirty hands.
Replace the contents of the drawer, then wipe down the drawer fronts and handles.

Wash the Kitchen Sink and Faucet – 10 minutes
Use a commercial cleaner or a peroxide and baking soda paste with a few ice cubes to clean the disposal. Dump your cleaner in, turn on the water, and run the disposal for a few minutes.
Once you turn the disposal off, wipe the underside of your garbage disposal flange. Food splatter builds up on the underside of the seal and can really stink up your kitchen.
You can use an old toothbrush to get into the crevices of the flange if needed.
Pour some drain cleaner down your kitchen drains and let it soak. If you prefer to use a natural product, try a slurry of hydrogen peroxide and baking soda.
Let that sit for 5 minutes or so. While that’s sitting, scrub around your sink faucet and drains.
If you have a sprayer head, pay special attention to any build-up on the sprayer. If there’s a lot of build-up, soak the sprayer in a dish of white vinegar for 30 minutes. Give it a good scrubbing and rinse it off.
Wipe down the faucet and around the base, scrub the sink, then rinse everything with hot water. Let the hot water for a few minutes to flush everything through the drain.
Scrub the sink basin with some scrubbing cleaner.
Wipe Down the Backsplash, Countertops, and Light Switches – 10 minutes
Spray the backsplash and countertops with cleaner and let sit for a couple of minutes.
While that’s sitting, take your grout brush and clean the crevices on your switchplates. Wipe clean with a damp microfiber cloth, then use the cloth to wipe the counters and backsplash.
Make sure you select the correct cleaner and cleaning method depending on the type of countertops and backsplash you have.
I have granite countertops in my kitchen and I normally just use soap and water on mine. Never clean granite with vinegar, bleach, or any other acidic cleaners because it will damage them.
Once you’re done with the cleaning, you may need to seal the surfaces. I save all of my sealing until after the entire kitchen is clean.

Deep Clean the Dishwasher – 10 minutes
Remove the lower rack and sprinkle baking soda on the sprayer arms. Spritz the baking soda with a little vinegar, let it stop foaming, then gently scrub with a scrub brush.
Rinse the sprayer arms with a glass of water, then inspect the little sprayer holes for build-up. Use a toothpick to remove any remaining build-up.
Pull out the filter and rinse all the gunk out. Don’t know where your filter is, check your owners manual or look online.
If your filter is really dirty, you may need to do some mild scrubbing to remove all of the mess. Clean out the area where the filter sits, then put the filter back in place.
Spray the interior walls and door with hydrogen peroxide. Let it sit for 5 minutes, then scrub.
Pay special attention to crevices where food particles can get trapped. Don’t forget to clean out the area where the hinges retract.
Wipe down the exterior of the dishwasher door including the handle and control panel. Pay special attention to the sides of the door.
Wipe Out the Lower Kitchen Cabinets – 10 minutes per cabinet
Remove the contents from each cabinet one at a time. Vacuum and wipe out the entire interior and don’t forget the underside of the shelves and back of the door.
Put the contents back in the cabinet and wipe down the door front, any side panels, and the knobs.
Clean the Baseboards and Kitchen Floor – 20 minutes
I cheat when I do my baseboards. I clean mine by wrapping a microfiber cloth around my broom and dusting them off. Then I wrap a clean wet cloth around the broom and wipe the baseboards again.
If I notice any dirty areas, I’ll hand clean them. Once you’re finished with the baseboards, sweep, vacuum, mop, or scrub your floors accordingly.
Apply Conditioners and Sealers as Needed – 15-30 minutes
Now that your kitchen is sparkling clean, apply any wood conditioners, granite, tile, and grout sealers, floor polishes, etc. as needed.
Kitchen Deep Clean Checklist Complete
You’re Done! Whether you did it all in one day, or in small sections, you finished the entire kitchen deep clean checklist. Grab a glass of wine, relax, and enjoy your spotless kitchen.
While you’re drinking that wine, head over to see how to deep clean your bathroom.
1 Where are germs hiding in your kitchen? Study finds surprising results – CBS News