
41 Genius Spring Cleaning Hacks Guaranteed to Make Your Life Easier
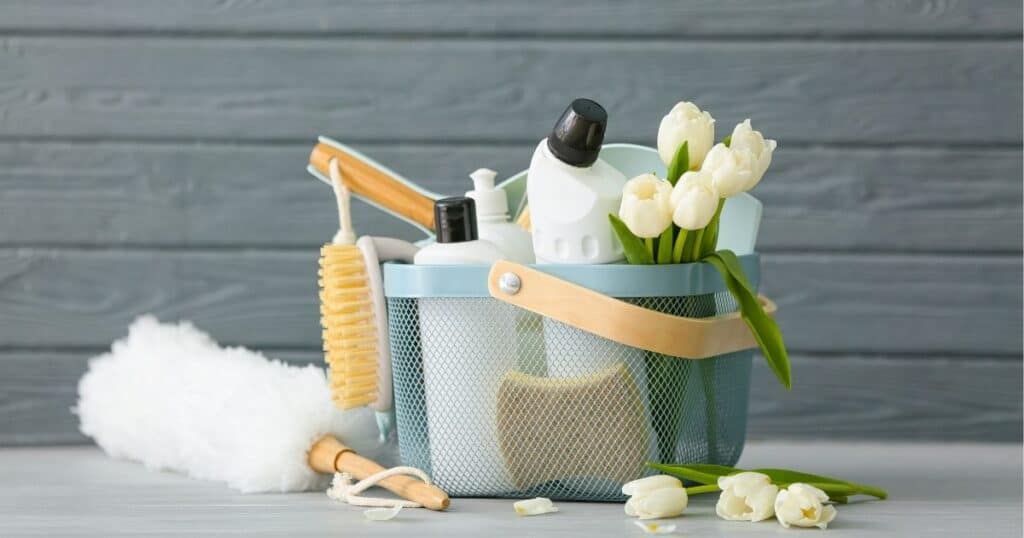
Hello warm weather, chirping birds, camellia blooms, and spring cleaning. Ugh, spring cleaning! If you loathe spring cleaning like I used to, I have some good news! Here are a bunch of spring cleaning hacks that make it easier.
The origins of spring cleaning can be traced centuries back through Iranian, Jewish, and Chinese cultures.1 The purposes vary greatly, but the tasks and outcomes are pretty much the same.
After a long winter of keeping everything closed up, it’s time to let some fresh air in and get the dirt out. It’s time to tackle the cobwebs, dust bunnies, stubborn stains, and pet hair that have been piling up in the dark corners of your home all winter long.
In a 2018 cleaning survey, the Cleaning Institute determined that 91% of Americans do some form of spring cleaning and the biggest reason is to give their homes a thorough cleaning.2
This post may contain affiliate links. Please see my disclosure policy for details.
What is Included in Spring Cleaning?
Spring cleaning includes dusting the ceilings, washing the walls, polishing the furniture, shining the fixtures, and scrubbing the floors. It’s disinfecting every nook and cranny in your house, in order to clean all of those things you probably forget to clean during your normal weekly cleaning routine.
It sounds completely overwhelming and maybe even impossible, but it’s really not too bad. With a good spring cleaning checklist and these time-saving hacks, you’ll have your home spring cleaned in no time.
Spring Cleaning Hacks to the Job Easier
I’ve broken these hacks into sections so you can quickly find the tips and tricks for what you’re currently working on.
General Cleaning Hacks
This first section is all of the general hacks that are applicable throughout your entire house and are helpful any time your cleaning anything.
1. Make Cleaning Easier by Working in a Top-Down Pattern
Cleaning tasks like dusting can get a little messy, especially if they’re over your head. To avoid creating more mess and extra work, start at the top and work your way down.
For example, if you’re deep cleaning your kitchen there’s no point to disinfecting all of the counters before you dust the tops of the cabinets. You’ll likely end up knocking some of that dust down on to the counters and will need to clean them again.
This post may contain affiliate links. Please see my disclosure policy for details.
2. Remove Scuffs Marks with a Magic Eraser
Scuff marks can be difficult to remove, but a magic eraser can erase them in mere minutes.
Get the magic eraser slightly damp, then scrub away. It works well on painted walls, laminate, ceramic, melamine, plastic, silicone, and glass surfaces just to name a few.
I always wipe the surface with damp cloth to remove any residue after using the magic eraser.
3. Use a Lint Roller to Dust Lampshades
Lamp shades can be tricky to get clean. Microfiber cloths leave too much dust on the shade, and the vacuum attachment just seems to push the dust around.
Try using a lint roller. Start by rolling the sticky tape over the sides of the lampshade, then roll it over the top and bottom edge to pick up any stragglers.
If you have an accordion lampshade, use a stiff bristle brush to loosen dust, then vacuum up the loose stuff.
4. Save Time with Lint-Free Microfiber Cleaning Cloths
Using a lint-free microfiber cleaning cloth will save you a ton of time on things like mirrors, windows, glass shower doors, and stainless steel appliances.
The extra scrubbing power from the loops of the microfiber makes scrubbing tough messes and stubborn stains quicker and easier. Plus they grab the lint and remove it from your surfaces.
I rarely use any other kind of cloth or towel when cleaning because microfiber does such a good job.
Pro Tip: Never wash your microfiber cloths with other towels or linty fabrics. They’re so good at picking stuff up that they’ll pick up and hold the residual lint.
This post may contain affiliate links. Please see my disclosure policy for details.
5. Clean Lighting Fixture and Heating Vent Covers in the Dishwasher
Remove and place lighting fixture covers, heating vent covers, and exhaust fan covers in the dishwasher. Put the lighting fixture covers on the top rack, and the vent and fan covers on the bottom rack.
Run them on a short or light soil cycle to get them sparkling clean without much energy from you.
6. Deodorize Fabrics with a Spritz of Rubbing Alcohol or Plain Vodka
A lot of fabric sprays just mask odors with different smells. Rubbing alcohol and vodka are both very effective at neutralizing most odors
Treat smelly fabrics, including window coverings and furniture, with rubbing alcohol or plain vodka. Spritz the fabric then let it air dry.
Pro Tip: Out of deodorant, you can use rubbing alcohol in a pinch. Gently wipe it across the skin of your armpit and let air dry. Be careful if you just shaved, the alcohol will sting a bit on any open skin surfaces.
GIVE YOUR HOME A THOROUGH CLEANING!
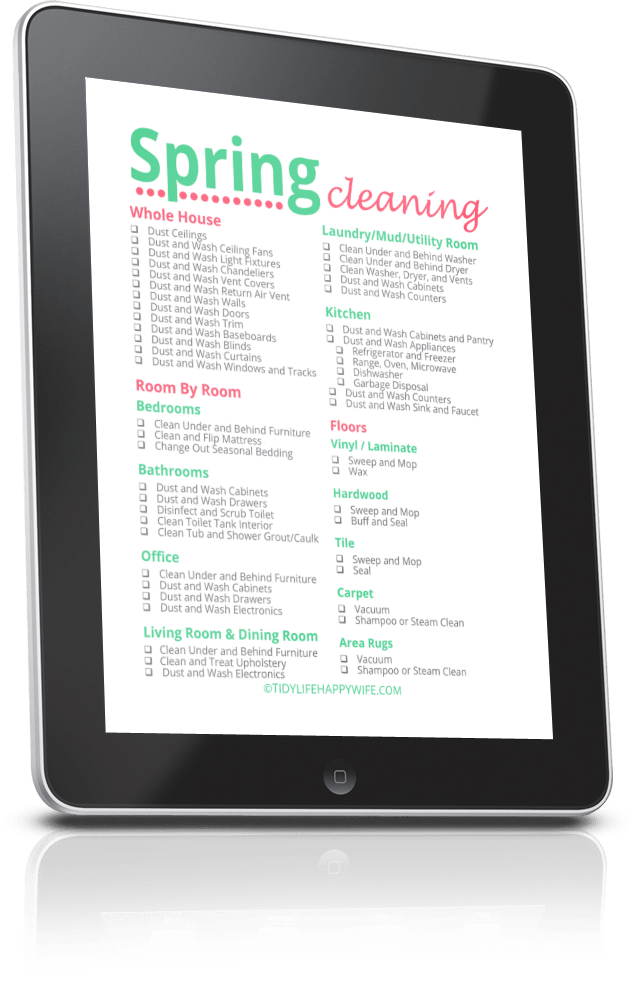
Join thousands of VIPs for cleaning, decluttering, and organizing tips sent straight to your inbox. As a welcome gift, we’ll send you this FREE printable Spring Cleaning Checklist that lists exactly what to deep clean in every room of your home.
7. Quickly Disinfect Door Knobs and Light Switches with a Disinfectant Wipe
Disinfectant wipes are great for a quick clean of high touch surfaces like light switches, door knobs, cabinet knobs, and appliance handles.
Before leaving each room, wipe down all door handles, light switches, cabinet knobs, and appliance handles with a disinfectant wipe. Let the moisture air dry so it has time to kill any bacteria.
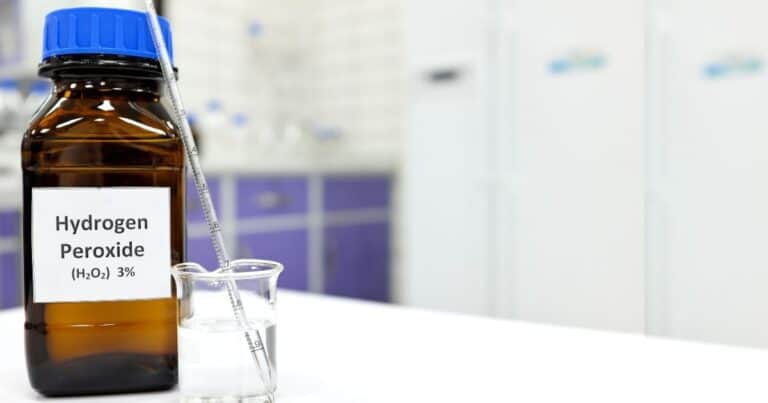
8. Disinfect Large Surfaces with Hydrogen Peroxide
Hydrogen peroxide is a great anti-bacterial solution which makes it perfect for household cleaning. It can be used to disinfect most surfaces and helps prevent the spread of viruses in your home.
To disinfect any surface, spray or wipe the surface with peroxide and let air dry. The surface needs the remain wet for a brief time to actually kill the bacteria.
9. Freshen Drains the Natural Way
Slow, smelly drains are usually the result of food and grease buildup.
Freshen and unclog stinky drains by pouring a slurry of baking soda and peroxide down the drain. Let it sit for 10-30 minutes, then flush for a few minutes with running water.
The baking soda neutralizes the smell. The combination of the two causes a reaction that liquefies the grease, and the peroxide kills any bacteria.
This powerful duo is my favorite DIY all purpose cleaner.
10. Clean Hard Water Stains with Baking soda and Hydrogen Peroxide
Baking soda and hydrogen peroxide are more effective at cleaning hard water stains that Vinegar and baking soda.
Make a past of peroxide and baking soda. Cover the stain and let it sit for 30 minutes, then scrub. Rinse and dry.
The exothermic reaction makes quick work of those stubborn water stains.
Spring Cleaning Tips for Ceilings and Walls
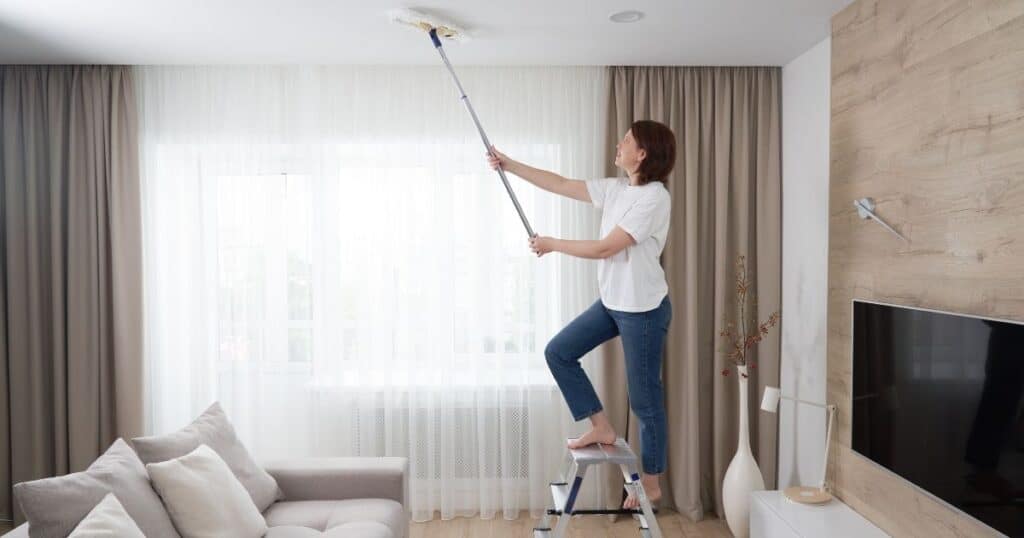
11. Start at the Top
Remember the tip about cleaning top to bottom? The ceiling is the highest surface in your home so it’s a logical place to start.
I have vaulted ceilings and use an extendable tool to clean them. It’s easier to clean all of the ceilings in my home at one time so I only have to get that tool out once.
I start in the farthest room and work my way through the entire house.
12. Use an Extendable Microfiber Dust Mop to Clean Walls
The walls in your home are one of the largest surfaces you need to clean. The best way I have found to get it done quickly is to use a microfiber mop.
Start by dusting the walls with a clean, dry mop. Shake the dust out of the dry mop head.
Wet the mop head in your favorite cleaning solution (I use a gallon of warm water and a cap full of Mr. Clean), then wring out as much as possible. You want the mop slightly damp, but not wet enough to cause any drips.
Start at the top and mop the walls working top down, side to side.
It’s a lot quicker and safer than a ladder. Plus your arms, neck, and back will thank you.
13. Slide a Microfiber Pillowcase Over Ceiling Fan Blades for No-Mess Cleaning
Ceiling fans are one of those cleaning tasks that usually creates a bigger mess. The dust from the tops of the blades always ends up on the floor and getting tracked all over the place.
Make this task a little easier and less messy by using a king size microfiber pillowcase.
Slide the pillowcase over the blade. Place your hands on top of the pillow case on each side of the blade and pull the pillowcase to the end of the blade.
The dust is trapped inside of the pillowcase instead of all over your floor. Make sure you empty the pillowcase out before tossing it in your washing machine.
14. Wrap a Microfiber Cloth Over a Broom to Dust Baseboards
Hand dusting and washing small, low surfaces is time consuming and back breaking.
Work smarter, not harder by using a large rubber band to secure a microfiber cloth over the bristles of your broom. Use the broom to knock the dust off the top surface of your baseboards and save your back at the same time.
15. Use Dryer Sheets to Repel Dust from Baseboards and Trim
Baseboards are dust collectors but now that you cleaned them with your DIY microfiber broom, it’s time to protect them.
Once they’re clean, wipe baseboards and trim down with a new dryer sheet to help repel and reduce future dust build up.
Tricks for Spring Cleaning Windows and Coverings
16. Prevent Streaks by Washing Windows on a Cloudy Day
Heat and direct sunlight make your window cleaning solution dry too quickly and causes those pesky streaks.
Wash windows on a cooler, cloudy day to prevent streaking.
17. Quicky Identify Window Streaks by Washing in Opposite Directions
If you do get streaks, wash the interior window in one direction and the exterior in the opposite direction. The different directions make it easier to identify which side the streaks are on.
18. Freshen Up Window Coverings in the Dryer
Skip the dry cleaner and use your dryer to freshen up your window coverings.
Give them a quick vacuum, then toss them in the dryer on air dry for 10 minutes. This knocks the rest of the dust off and relaxes any wrinkles.
Toss a dryer sheet in to help repel dust and give them a scent boost.
19. Use a Stiff Bristle Brush and Canned Air to Clean Tight Spots
I call canned air my cleaning assistant. It’s great for blasting dust and dirt out of tight spots.
I use it to clean window tracks, blast dust out of small vent openings, blow grime out of the recessed of light switches, and to clean the corners of the glass shelf slots in the refrigerator.
Spring Cleaning Tips for the Kitchen
20. Steam Clean the Microwave
Place a bowl of water with some lemon juice in the dirty microwave and heat on high for 5 minutes. Let it sit for a few minutes, then carefully remove the bowl and place it in the kitchen sink.
Wipe the loose bits out with a damp paper towel and throw it away. Use a dry cloth to wipe up the remaining moisture and food bits.
21. Go With the Grain for Shiny Stainless Steel
There are 101 different cleaners you can use on your stainless steel, but the one trick guaranteed to create a perfectly shiny surface is to go with the grain. Always wipe your stainless steel in the same direction of the natural grain pattern.
Wiping opposite of the grain or in a circular motion will leave nasty streaks all over the surface.
I’ve been known to use a little dish soap and water in a pinch, but I really like this stainless cleaner for a high polish finish.
22. Clean the Garbage Disposal with a Bottle Brush and Paper Plate
Garbages disposals can get pretty disgusting. That food is getting splattered everywhere including the under side of the splash guard.
Cut a hole in the middle of a paper plate for the bottle brush handle. Spray the brush with some hydrogen peroxide, sprinkle with baking soda, and scrub away.
Make sure you run the bristles of the bottle brush through the underside of the splash guard to get all of that food off.
23. Unclog Dishwasher Sprayer Holes with a Toothpick
Hard water lime scale can build up on any surface, including the sprayer holes on your dishwasher. If the scale builds up enough to restrict the water, your dishes won’t get as clean.
After scrubbing the sprayer arms, use a toothpick to get any scale buildup out of the sprayer holes. Rinse with hot water and wipe any bits out of the bottom of the appliance.
24. Seal Porous Countertops to Prevent Future Stains
You’ve heard the saying ‘an ounce of prevention is worth a pound of cure’. That prevention also makes cleaning a lot easier.
Seal porous countertop materials periodically to prevent stains from soaking in and setting. I have granite counters in my kitchen and I seal them twice a year with a stone sealer.
Spills pool on the surface and wipe up easily.
25. Place a Pot of Boiling Water in the Freezer for a Quick Defrost
If your freezer is beginning to look like an ice cave, it’s time to defrost it.
Remove all of the food and place some towels in front of the appliance to catch the melt off. Place a pot of boiling water inside the freezer and let the steam do all of the work.
Once the ice has all melted, give it a quick wipe with a clean towel and it’s ready to go.
26. Use the Bathtub to Effortlessly Clean Fridge Bins and Shelves
Refrigerator bins can get pretty gunky. Besides the forgotten produce that liquified in the back, they also tend to catch bits of every spill that happens.
Instead of expending too much energy, set those bins in a tub full of warm, soapy water. Let them soak while you’re cleaning the rest of the fridge.
Once you’re done with the fridge, you can give the bins a quick scrub in the tub. Then just rinse, dry, and reinstall.
27. Clean Your Oven the Easy Way
If you don’t like harsh chemicals, but don’t like scrubbing for hours either, the easiest way to clean your oven is to apply a DIY cleaning solution and let it work it’s magic overnight.
Cover oven walls with a paste of hydrogen peroxide, baking soda, and a little Dawn dish soap. Let it sit overnight, then scrape out the goo.
Scrub any remaining spots and wipe clean.
Bedroom Spring Cleaning Hacks
28. Deodorize Mattresses with Baking Soda
Freshen up your mattress by sprinkling with baking soda and let it sit for 30 minutes.
Vacuum up all of the baking soda and spritz with your favorite essential oil fabric spray.
29. Sanitize Pillows in the Washing Machine
Pillows get a lot of use, and they can get pretty dirty.
Place pillows in the washing machine and run on the sanitize cycle. Fluff them back up by adding a couple dryer balls or tennis balls to the dryer cycle.
30. Clean Stuffed Animals in the Washer on the Hand Wash Cycle
All of that snugglin and dragging around makes for some pretty dirty stuffed animals.
Toss them in the washer on the ‘hand wash’ cycle to freshen them up.
31. Use a Mesh Bag to Clean Hard Plastic Toys in the Dishwasher
Don’t want to scrub those legos and blocks by hand, no worries.
Put them in a mesh laundry bag to keep them together and run them through your dishwasher on the top rack.
CAUTION: Check the manufacturer’s instructions before doing this as some toys can melt due to the high heat in the dishwasher.
Spring Cleaning Bathroom Tricks
32. Toss Shower Curtains in the Washing Machine
Shower curtains are next to impossible to get clean due to the seams around the edges.
Make your life easier and toss them in the washing machine. Toss in the dryer on the air setting for a few minutes to get any wrinkles out, then hang back up and let air dry.
33. Kill Mold Spores with Hydrogen Peroxide
Very few bathrooms are properly ventilated, and a poorly ventilated bathroom leads to mold.
You can effectively kill and eradicate bathroom mold by soaking with hydrogen peroxide for 15 minutes, then scrub and rinse.
Want to completely prevent bathroom mold? Periodically spray susceptible areas with peroxide and leave them to dry.
34. Scrub Dirty Grout With Hydrogen Peroxide and Baking Soda
Clean and brighten dirty grout with my favorite natural cleaning duo.
Mix a paste of peroxide and baking soda. Cover grouted areas and let it sit for 15 minutes to work it’s magic.
Scrub and rinse the area and enjoy your refreshed grout.
35. Seal Clean Grout to Make Cleaning Easier Next Time
As with most naturally porous surfaces, sealing grout will help it repel grime and stains.
Use a sealant applicator to liberally apply sealant to grout lines, and let it dry. I apply a couple rounds of sealant to make sure it’s fully sealed.
Pro Tip: Want to know if your grout is adequately sealed? Put a little water on it. If the water beads up and stays on the surface, the sealer is doing it’s job. If the water disappears and the grout looks a little darker, it’s time to reseal.
36. Remove Hard Water Buildup with Hydrogen Peroxide and Baking Soda
Got hard water buildup in the shower or around your faucets? Hydrogen peroxide and baking soda create an exothermic reaction that breaks down the scale buildup.
Cover buildup with a thick paste and let sit for 15 minutes or so (longer is better). Give it a little scrub and rinse away the scale.
37. Rub Fixtures with Wax Paper to Prevent Water Spots
Do your bathroom fixtures get water spots the first time you use them after cleaning?
Try rubbing them with wax paper, then buff to a shine with a microfiber cloth to keep them looking shiny longer.
Cleaning Tips for the Laundry and Utility Room
38. Clean Fabric Softener Buildup from the Agitator with a Bottle Brush
Have a top load washing machine? Is it getting a bit smelly? It’s probably the fabric softener that’s stuck to the insides of the agitator arm.
Sprinkle a little baking soda on a bottle brush and scrub away. The bottle brush will get into all of the little nooks and crannies and remove the residual fabric softener.
39. Remove Lint Screen Fabric Softener Buildup in the Dishwasher
Your lint screen might look clean, but if you move it under a stream of running water and the water doesn’t just flow right through, your screen is clogged. The fabric softener build up is restricting the air flow just like it restricted the stream of water.
Toss it on the top rack of the dishwasher to remove all of the buildup.
40. Keep the Dryer Lint Trap Clean with Your Vacuum Cleaner
You pull the lint off of the lint screen after each load, but you can still see tons of lint when you put it back in place.
Use this helpful little tool to clean lint out of the slot where the screen sits. You’ll be shocked how much lint it removes.
41. Use a Power Drill to Keep the Dryer Hose Fire Risk Low
One of the most common causes of household fires is excessive lint buildup in the dryer hose. Keep yours clear with a brush attachment you can hook onto the end of a power drill.
Run the brush through the dryer hose and don’t be shocked at how much lint it pulls out. The brush gets into the grooves on the hose and removes the lint that your vacuum attachments can’t get to.
What to Do When You’re Done Spring Cleaning
See, you’ll have a clean home in no time with all of those spring cleaning hacks making it all quicker and easier.
Once you’re done, take a moment to relax and enjoy! Don’t take too long though, the next step is to get your home organized so it’s easier to keep it clean.
1 The Surprising History Behind Spring Cleaning – Bob Vila
2 2018 National Cleaning Survey Results – The Cleaning Institute


Hi Tanya,
Whew!! Just reading through this post makes me tired! Your house must be spotless. I agree with your tips on cleaning windows on a cool cloudy day. It really helps to cut down on the streaks. Also, the homemade oven cleaner is the bomb! I have used that formula for a few years now, and love the ease of wiping off the gunk the next morning and no more fumes! I am slowly going to check off the boxes as I start to feel a little better. You give me a plan and courage to do a little bit every day. Thank you!
LOL. Not even close Karen. I keep my home tidy, but it’s far from spotless. I find that if I do a little spot cleaning every day, it all gets done eventually. If the deep cleaning gets done once a year, I call it a win!